
Monitor Temperature on Victron's Cerbo or Ekrano GX Using Ruuvi Sensors
Updated May 1, 2025
Many of our customers want to know just a little more about the status of their home, boat, or RV. What was the temperature in the freezer last week? What is the humidity in a critical mechanical space?
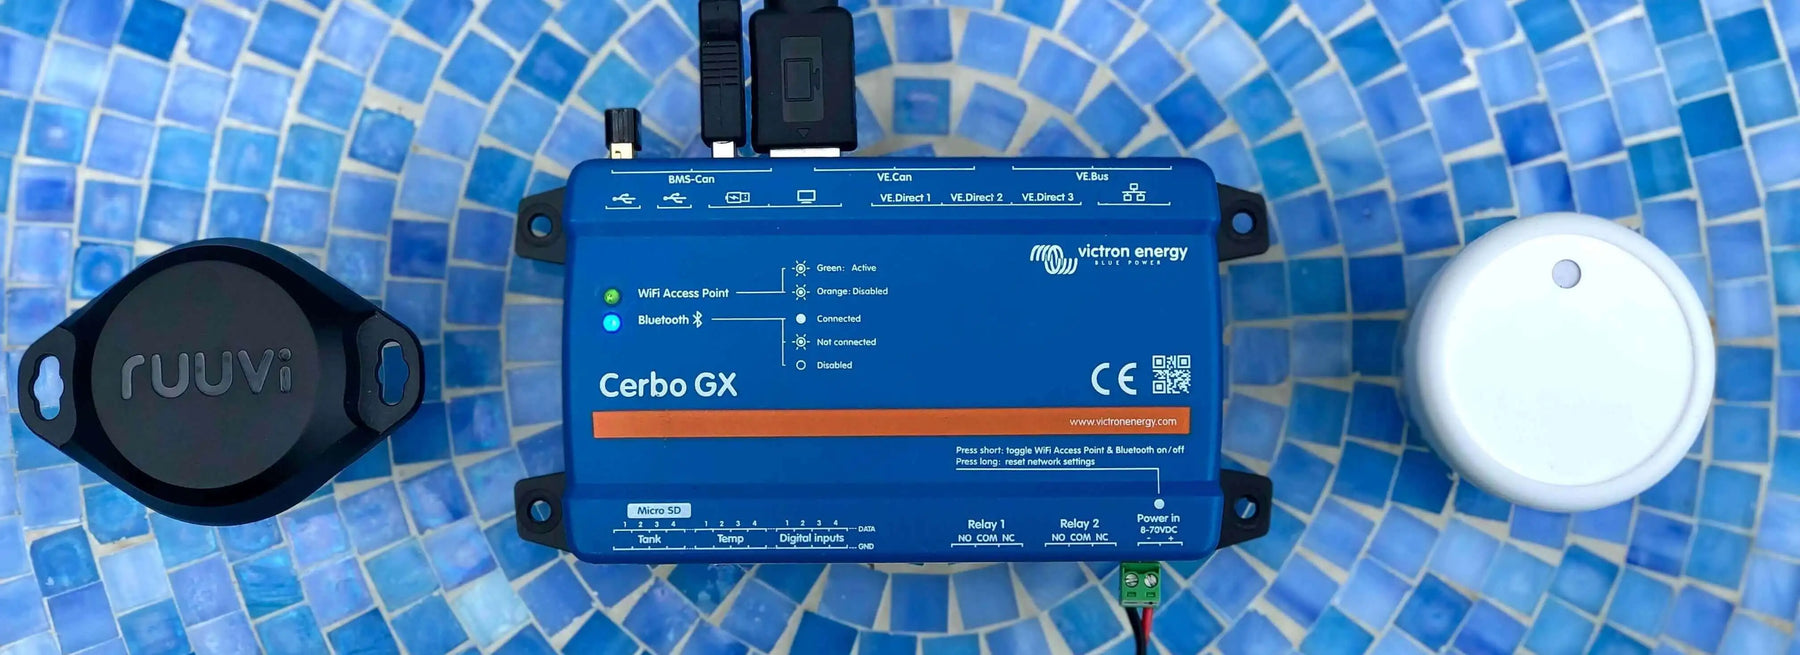
In this article, we'll show you how to start monitoring temperature, humidity, and air pressure data from anywhere in the world using your existing Victron system. This setup combines a Ruuvi Bluetooth sensor with Victron's Cerbo GX MK2 device and optional GX Touch 70 display screen or an Ekrano GX which has it’s own built-in 7-inch display. The steps to set up are the same on both devices.
A Victron GX device is a powerful and flexible computer at the heart of your Victron system. Embedded into the Cerbo and Ekrano's design are a long list of capabilities that, when taken advantage of, open up new opportunities to improve performance overtime and in this case, prevent costly damage or harm to equipment, property, perishables, pets, etc, when conditions get too warm, too cold or too wet.
Keeping the most relevant data in one place dramatically improves the value of that data, which is why we love Victron's Remote Managing platform (VRM). It's free to use and it's fantastic. It shows a clear snapshot of your power system and a detailed graphical analysis. It can also be set up to trigger email messages based on anything you can think of (Ex: the temperature of your lithium batteries, Whether the fan has been running too long on the inverter, you name it.) See how to set up these alarms in VRM below.
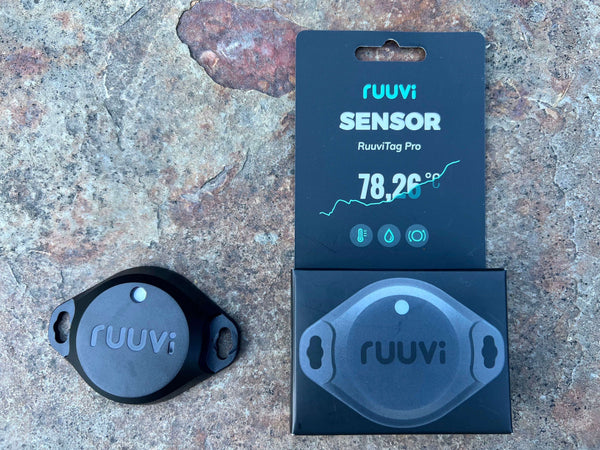
If you're not yet familiar with the Ruuvi, these are durable, highly reliable Bluetooth IoT sensors. Paired with an internet gateway, these sensors allow you to wirelessly monitor temperature, air humidity, air pressure, and motion.
>> Shop all Ruuvi products and accessories
Ruuvi makes a gateway with a fancy antenna and has a great online portal for monitoring all things Ruuvi. The Cerbo or Ekrano GX can also function as a gateway for monitoring temperature, humidity, and air pressure.
A Ruuvi sensor can be mounted anywhere, and depending on which model you buy, they can withstand even the nastiest North Sea environment. And there is no limit to the number of sensors you can connect and start monitoring. (100 Ruuvis might be pushing it, but... maybe not. Try it and let us know.)
This is exciting because the Ruuvi offers fantastic functionality for anyone with an existing Victron system.
If you've gotten this far, congratulations. You're in for a treat.
Using Victron's Cerbo GX and remote management platform (VRM), you can trigger either a relay or a software alarm on the Cloud. The software alarm can generate an email message to you (or your butler.) Read on for a practical example of this.
Sounds Ruuvi, baby. Let's do this!
Say you've purchased a few Ruuvi sensors that you'd like to connect to an Ekrano or a Cerbo GX. You'd also like to cycle Relay 2, and you want to receive an alert in your email inbox when something is too hot or cold.
There are 3 easy ways to access your Cerbo device: 1. Its specific IP address, 2. The Touch Screen 50/70 and 3. The Remote Console on VRM. The dashboard looks the same from the touchscreen, mobile phone, or computer.
- First, check the firmware status of your Cerbo GX. Click on Firmware, look for a tab called Online Updates, and select Check for Updates. If an update is available, you can choose to update to the latest firmware, which will include any updates specific to the integration with Ruuvi sensors.

Note: Trying to update a Cerbo that is not connected to the internet? Follow the instructions in the Cerbo GX manual to download the most recent firmware, save it on a USB or micro-SD card and initiate the update by going to Settings > Firmware > Install firmware from SD/USB.
-
Once that update is done, go back to Settings. Scroll to Integrations and select Bluetooth Sensors. There you will see any sensors that are operational and from this view, you’ll be able to toggle them on or off. This doesn’t turn the sensor off (that would require removing the battery from the Ruuvi) but it does remove the sensor from your connected Device List (which is just a list of all the devices communicating with the Cerbo or Ekrano GX).
Note: To remove the sensor from your VRM dashboard view, just go to the Installation in VRM > Device list > find the sensor and select Delete device.

- On the back of every Ruuvi, you'll see a plastic tab that keeps the battery disconnected until it's ready for use. Pull that tab, and the Ruuvi will be activated and appear on your Bluetooth Sensors list.
Hot Tip: If you have 2 sensors and turned them on simultaneously, it will be very difficult to tell them apart. The product ID code that shows up on the Cerbo is not easily identified physically on the Ruuvi itself. If, like me, you pulled all the plastic tabs already, you could put one in the freezer so that its temperature reading suddenly changes, making it quickly identifiable. You could also take the batteries out, so they are not sending a signal, and then add them back one by one as you identify and label them.

- Once the sensors are talking with the Cerbo or Ekrano, they'll show up here on the Device List.

- Click on the sensor you want to edit, and you'll have the option to name it under the heading Device name. Here you can change it from the product ID code to whatever the location is called or however you've planned to label them (yacht fridge, camper, greenhouse).
- In the Device list view, you will see more specific data about your sensor, including the battery voltage of the Ruuvi. As with all the drill-down menus in updated Victron OS, this is a nice way to check in and get some quick information locally.
Note: How do you switch the default display from degrees C° to F°? You can change this by going to your VRM dashboard. When you first open VRM, look for Preferences, in the main menu (outside of your installation settings). Click on Display Preferences and specify F° as the temperature unit.
Controlling an onboard relay on the Victron Cerbo with a Ruuvi sensor
Now, your sensors are turned on and connected to VRM (bravo!) But, let's say you want to control something like a buzzer or a heater in a specific space:
- Go back into Settings and down to Integrations. Open the Relays tab. There are 2 built-in relays. Either can be controlled with temperature data from the Ruuvi sensor.

- Under Temperature Control Rules, I can set a value for the relay to close (activate) and a value at which it could open (deactivate).

- For example, say I have a sensor zip-tied to a pipe in the boiler room of my guest house. In my case, at less than 120 F°, I'd like to close a contact that turns on a buzzer that I've wired in. I want that buzzer to continue to run until the boiler reaches above 140 °F, at which point I want to deactivate the alarm.

Next I have to choose which relay this condition applies to. I'm going to use Relay 1. Note that for each sensor, there are two totally independent conditions that you can program for either relay.

In addition to the physical buzzer, you can also set up alarms in VRM online to send an email alerting you that your temperature is too high or low. To do that, let's look at the main VRM dashboard:
-
Under Settings > Alarm Rules on VRM, click Add New Alarm Rule and select the appropriate sensor this rule will be assigned to.
-
Inside Alarm Rules, I will create a new alarm rule for the boiler temperature. I'll select a parameter: Temperature. And again, I can set that activation value at 120 F°. I want the alarm to stop or clear at 140 °F. This is a low-temperature trigger.

-
With this alarm set, an email will go out to the selected users. I can also set up a high-temperature alarm that will let me know when my pipe is over 190 F°. When it returns to a normal operating temperature of 180 F°, I want the emails to stop. In this example, my boiler is designed to run at 168 °F, so this alarm should never go off unless something bad is happening. The email will include details on the reason for the alarm, High or Low, in this example. But it also shows up as a red banner on the top of VRM when you are logged in.
- Importantly, I can also change how long it takes before a notification is triggered. In many cases, you don't want to set an alarm unless the temperature has been above that threshold for some time (Ex: running too hot for over 10 min) to ensure that the issue is persistent, not a temporary change. In the field below, we can select who gets this email notification.
-
Again, looking under Settings > Alarm Rules in VRM, we can see the different alarms that have been created and edit them as well. The word "alarm" could also be replaced with a "warning" if you want to be proactive about potential issues. Many users set up "alarms" as warnings and relays as the actual alarm.
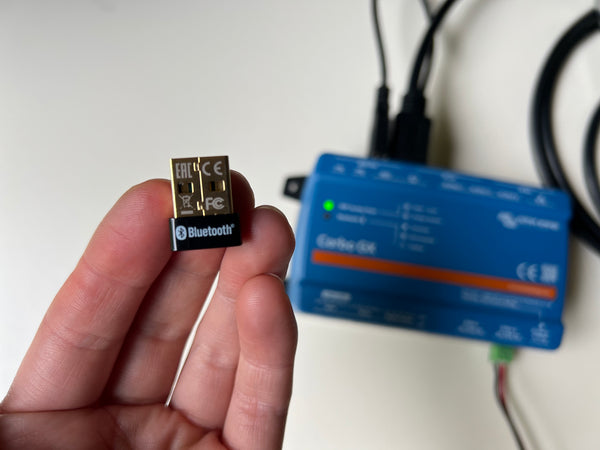
We highly recommended adding a Bluetooth radio to your Cerbo GX. A few options have been tested with good results by Victron, which are low-cost and simply plug into one of the USB ports on the Cerbo. We like and stock the TP-Link USB Bluetooth adaptor.
At the end of the day, keeping the most helpful and relevant information in one place (without opening a bunch of apps) dramatically improves the value of the data. Whether your power system is in a home, a boat or a refrigerator truck, case, coupling power system information with real-time weather data, for example, can be very helpful.Do you have a GlobalLink 520? The steps to connect Ruuvi temperature and humidity data to VRM are the same. Read our blog about Ruuvi's integration with the GlobalLink 520, an ideal way to remotely monitor small power systems.
Have questions about your specific use case or the hardware itself? Send a message to our team here.
Start measuring your world


RuuviTag Pro 4in1
Ruuvi
Original price
$55.90
Original price
$55.90
-
Original price
$55.90
Original price
$55.90
Current price
$54.50
$54.50
-
$54.50
Current price
$54.50
In stock
The new RuuviTag Pro 4in1 is a rugged environmental sensor that measures temperature, humidity, air pressure and motion. An IP67-rated version of t...
View full details

RuuviTag 4in1
Ruuvi
Original price
$39.90
Original price
$39.90
-
Original price
$39.90
Original price
$39.90
Current price
$37.50
$37.50
-
$37.50
Current price
$37.50
In stock
The RuuviTag 4in1 is a wireless, open-source sensor that measures temperature, air humidity, air pressure, and movement. Measurement results are s...
View full details

RuuviTag Pro 3in1
Ruuvi
Original price
$44.90
Original price
$44.90
-
Original price
$44.90
Original price
$44.90
Current price
$40.50
$40.50
-
$40.50
Current price
$40.50
In stock
The RuuviTag Pro 3in1 is a durable, wireless Bluetooth sensor for monitoring temperature, humidity and acceleration. This sensor works well in a wi...
View full details

RuuviTag Pro 2in1
Ruuvi
Original price
$41.60
Original price
$41.60
-
Original price
$41.60
Original price
$41.60
Current price
$38.00
$38.00
-
$38.00
Current price
$38.00
In stock
The RuuviTag Pro 2in1 is a rugged environmental sensor that measures temperature and acceleration. Perfect for demanding industrial settings and se...
View full details

Silicone Case for RuuviTag
Ruuvi
Original price
$4.00
-
Original price
$4.00
Original price
$4.00
$4.00
-
$4.00
Current price
$4.00
In stock
The multi-use RuuviTag silicone cover allows you to attach the RuuviTag Bluetooth Sensor to any surface using screws, zip-ties or by hanging. The s...
View full details

Stand for RuuviTag
Ruuvi
Original price
$4.00
-
Original price
$4.00
Original price
$4.00
$4.00
-
$4.00
Current price
$4.00
In stock
This silicone stand for the RuuviTag Bluetooth Sensor makes it convenient to use on flat surfaces in its optimal position (the sensor measures air ...
View full details

TP-Link USB Bluetooth adaptor
Intelligent Controls
Original price
$14.00
-
Original price
$14.00
Original price
$14.00
$14.00
$14.00
-
$14.00
Current price
$14.00
In stock
Using a Cerbo GX device to communicate with Ruuvi temperature sensors? We highly recommended adding an improved Bluetooth radio. We like this low-c...
View full details